
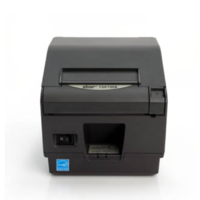
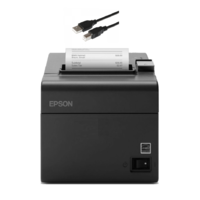
Epson TM-T82iV Thermal Receipt Printer Wifi / Wireless
Includes Wifi dongle
The brand new Epson TM-T82IV-WIFI is a compact and efficient printer designed for businesses that require reliable and fast printing. It is an upgraded version of previous TM-T82iii models, offering improved performance, ease of use, and energy efficiency.
What is included in the box? Epson TM-T82IV Printer, Wifi Dongle, sample thermal roll, AC Cable, USB Cable, IEC Power Cable, wall bracket, setup guide
TM-T82IV-WIFI Main Features:
- Interfaces: Wifi dongle, Ethernet, USB, Serial
- Thermal Line Printing
- mPOS/tablet support1 - Epson® ePOS SDK (iOS®/Android) support on the Ethernet model
- DHCP is enabled and automatically retrieves the printer IP address
- Print Speed: 250mm / second
- Reliable Print Heads: 150 km/150 million pulses
- Auto Cutter Life - 2 Million Cuts
- Fonts: 9 x 17 and 12 x 24 dots/character (W x H)
- 2 Year Return to Base Warranty
Specifications:
- Media 80mm wide or 58mm with inserts
- Column Capacity
- Standard:
- Paper width 80 mm: 48/64 columns
- Paper width 58 mm: 35/46 columns
- 42-column Mode:
- Paper width 80 mm: 42/60 columns
- Paper width 58 mm: 42/31 columns
Connecting an Epson TM-T82IV printer to a Wi-Fi network using a dongle involves a few steps, often requiring a computer for the initial configuration. The process can be done in a couple of ways: using the Epson TM Utility or by directly configuring the printer's web interface.
Method 1: Using Epson TM Utility
This method is generally the most straightforward and is recommended for initial setup.
-
Install the dongle and power on. Plug the Wi-Fi dongle into the designated USB port on the printer and turn the printer on.
-
Run the Epson TM Utility. Install and open the Epson TM Utility on a computer. This software is available on the Epson support website.
-
Connect to the printer. The utility will detect the printer, often through a temporary "SimpleAP" mode. This creates a temporary network that your computer can connect to.
-
Configure network settings. Use the utility's setup wizard to select your desired Wi-Fi network from the list and enter the network's password.
-
Save and restart. Once you've entered the information, send the settings to the printer. The printer will restart and connect to your Wi-Fi network.
Method 2: Manual Configuration via Ethernet Cable
This method is an alternative if you have an Ethernet port on your printer and prefer a direct, wired setup for configuration.
-
Connect the printer. Plug the Wi-Fi dongle into the printer and connect the printer to your network router using an Ethernet cable.
-
Print a network status page. Turn the printer on. It should automatically print a status page with its network information, including a dynamically assigned IP address. If it doesn't, you can often trigger a printout by holding down the reset button on the back of the printer for a few seconds.
-
Access the web interface. On a computer connected to the same network, open a web browser and type the printer's IP address from the status page into the address bar.
-
Log in. The default username is typically "epson" and the password is "epson" or the printer's serial number.
-
Configure Wi-Fi. Navigate to the network or wireless settings, select your Wi-Fi network (SSID), and enter the password.
-
Save settings and restart. Save the configuration and restart the printer. You can then disconnect the Ethernet cable, and the printer should connect to the Wi-Fi networ
(TM-T82IV-WIFI)
| SKU | TM-T82IV-WIFI |
| Brand | Epson |
Be The First To Review This Product!
Help other CompuBox users shop smarter by writing reviews for products you have purchased.


